Showing posts with label DIY. Show all posts

August 18, 2021

Building a Kitchen Island

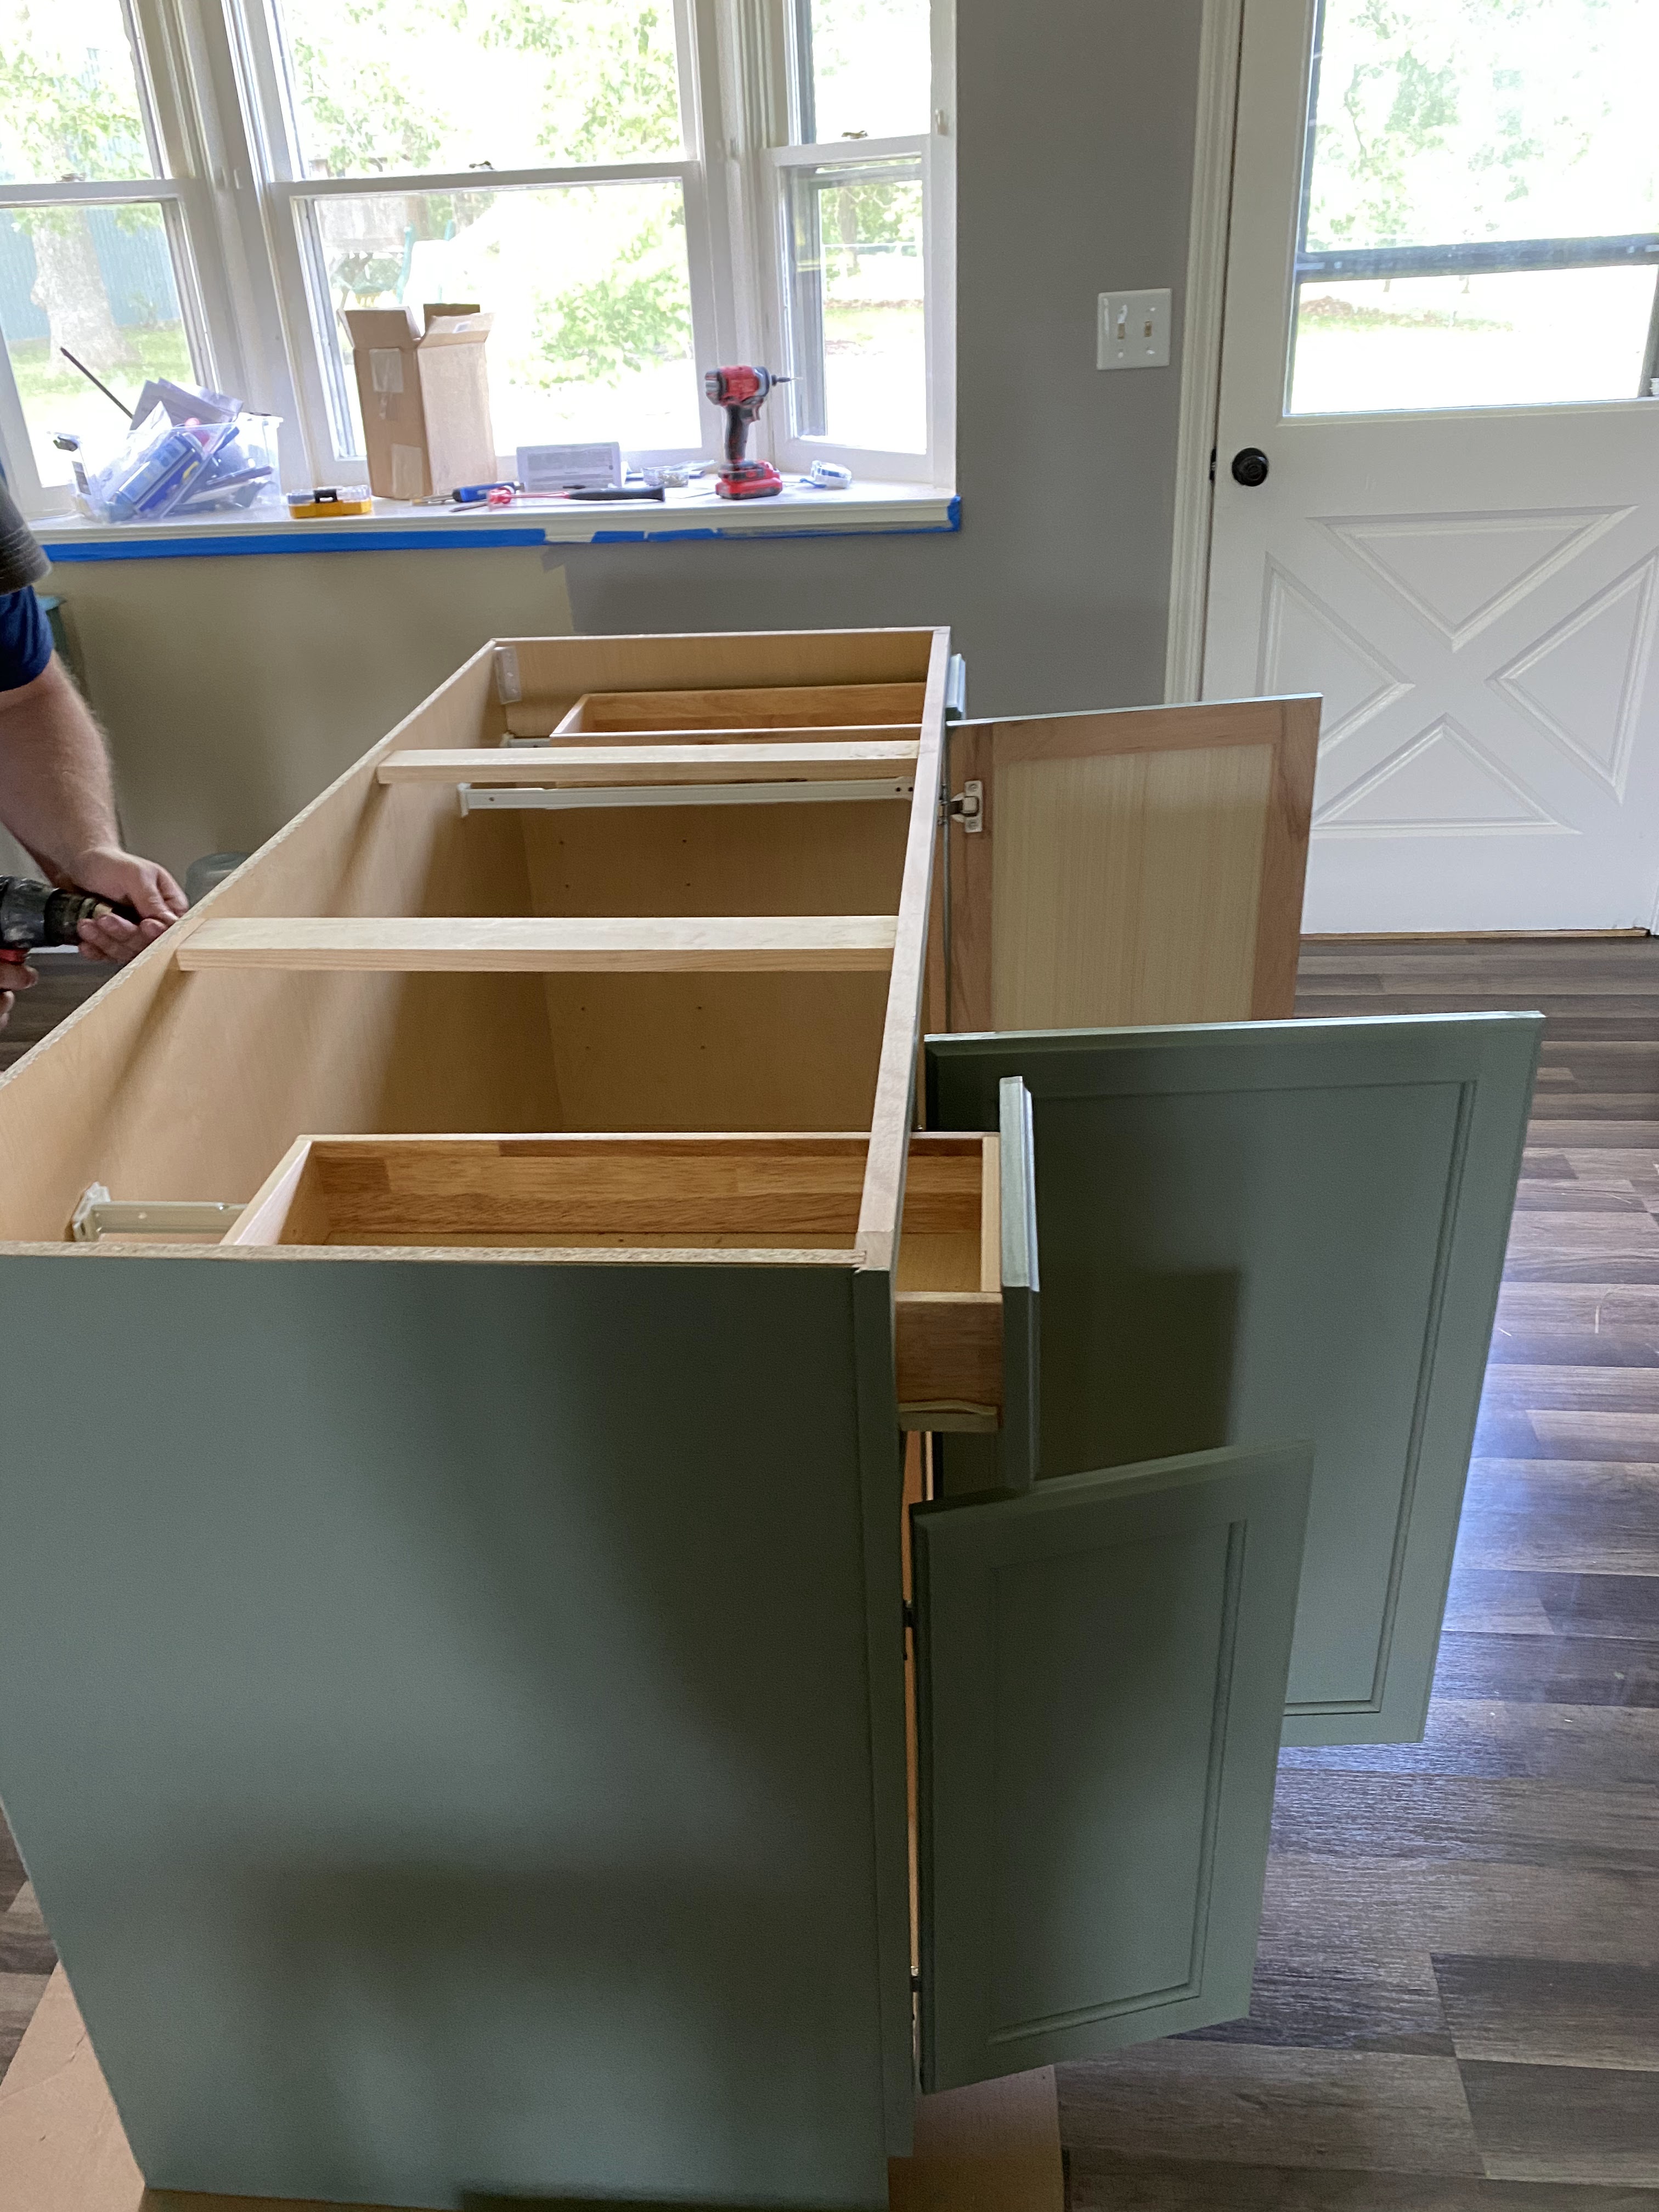
This isn't the first island we've built. The previous one in Colorado had more to it-- electrical, for one thing. This one is more basic, but also much more functional because it's bigger. 

In Colorado, our island had storage but it also had our stove on it, so the space was not as functional. It had a butcher block top and quartz counter around the induction stovetop. 

This time, we were looking for STORAGE underneath (we have no pantry) and SEATING. We eat, really, only at whatever bar top we have in our kitchens. Going on 4 houses now of eating exclusively at the bar top. We're those people, I guess. In Colorado, we ate almost exclusively on the couch, so...progress. 

Two things: This island is not attached to the floor yet or trimmed along the bottom because we are replacing this kitchen floor this winter. We also wanted to make sure it was exactly where we wanted it before we, literally, nail it down. 

While we bought the cupboards premade, Scott reinforced them with extra wood because premade cupboards bought at Home Depot aren't designed to be high-end or sturdy. This is the DIY of it all. 

These pictures go backwards because this isn't a tutorial (LOL) and that's how Google Photos does things. 


 Concerning this project, all I did was paint. I was so sick this day. I think this was my only contribution to anything that entire weekend. The color is Sherwin Williams Farm to Table. 


Supports for the bar top. Scott likes them as is, I kind of want to do them in off-white. Idk...This is the good part of DIY. You can change your mind and add to it later on. 


This is why Scott reinforces with real wood and supports: the "supports" in the middle were literally broken when we unboxed it. They were particle board. 


We were going to put this panel on it. We still may? Idk. We kind of just like it how it is. 


The first step was really to condition the bar top, stain it (it's a walnut stain), and then apoxy it (which took years off of Scott's life, I'm pretty sure...we've only done this once before and I'm quite sure we'll never do it again). 

In Case You Missed it:

Pleasant Surprises in the New House

July 28, 2021

Pleasant Surprises in the New House

We knew, upon buying this place, that it had what we needed: fenced-in yard, two acres, giant driveway, huge barn, 3 bedrooms, 2.5 bathrooms, new-ish appliances (not all work well, but that's another story), a/c and heat that both are functional enough, well water, etc. When we were looking for very specific non-negotiables (mainly the barn, the fence, and the few acres of flat, useable land), my expectations were low for the inside because those are always the things Scott says he can fix.

Fortunately, there wasn't as much fixing right away that needed to be done. When we moved into our house in Colorado in 2014, we more or less gutted the place over time. Ripping out dusty carpet and tearing up linoleum in 95 degree heat wasn't my best memory. The only thing we didn't rip out of that house was the drywall. 

In this house, it's a slower process. While some things drive me insane already, I'm trying not to let the little things get to me (i.e. light fixtures) because it just takes time. 

Here's a few pleasant surprises I didn't notice until moving time:


Black granite sink. 

These things are expensive, so it was a nice surprise. We've only ever had stainless steel, aside from the copper one we put in Colorado. 


Backsplash.

I don't think we've ever had a backsplash. We put one in Colorado (I remember grouting on Christmas Eve 2015), but usually rentals don't have them. This one is professionally done and, while I don't know that I would've picked it out of a line-up, I do like it. 

New carpeting.

The 3 bedrooms and the living/family room have brand new carpet. I am often wary of moving into a house with carpet but, if it's brand new, I can't argue with that. I prefer it in bedrooms and living rooms anyway.

Freshly painted walls. 

Again, no weird colors. I always appreciate a house that has that builder-grade, everything-one-color look. It's a blank slate. I've already painted one of the kitchen walls gray (obviously) because the muted cream color does get sterile-looking if it's everywhere. I am just glad there's no unicorns or bright yellow (Wyoming house had yellow walls...rereading this post, I had NO idea we'd end up having a baby in Wyoming LOL.)

The kitchen is more functional than I initially thought. 

What I did not like about this house was the kitchen. It was the non-selling point for me back when we were looking at houses in this area. I don't like kitchens that are basically squares or big open spaces with no structure in the middle or bare walls with no cupboards on them (wasted space!). It's the first thing I notice about a house...Call me whatever you want (a snob?) but it just looks unfinished to me when that's the case.

back in May...the wall looks yellow but it's cream. now it's gray.

However, this kitchen actually has a lot of counter space. While I wish there were a pantry, we put in the island already and that has small appliance storage and MORE counter space. It's probably my favorite project that we've ever done. I love counter space and this pulls the whole room together.

The front door.

If you recall, I am weird about front doors. The one in our rental in Pittsburgh was pale yellow and I couldn't stand it. This one...is red. It has a bit of style to it though. I don't hate it. We are eventually going to do the outside of the house in white, so a red door will look fantastic. As of now, it's fine. Not strong feelings. I'm kind of glad it's not brown or white, because that seems to be the standard out there and now I don't have to paint it. 


This wreath has been serving me well in 3 houses now. Getting my money's worth, I suppose. It was originally $75 at Hobby Lobby and I think I got it for $35. I can't believe someone would pay $75 for a foam flower Hobby Lobby wreath. 

*Please expect a remodeling update post once a week for the foreseeable future. I'm trying to write them all now, before school starts, because I'll never ever document this stuff if I wait.*

December 31, 2014

Redoing the Master Bedroom

I didn't go into Christmas break thinking we would be redoing our bedroom.  However, we wanted to get a new bed.  We wanted a king and then thought that we might as well get some furniture to match.  You see, we're that couple who has never invested in a bedroom set because we've been preoccupied with other things.  It was just never a priority and, honestly, is one.more.thing. to move every couple of years. Also, when you go from house to house, committing to furniture is hard because you never know how it will look/fit in the next place.

We found some furniture at American Lifestyle Furniture in Colorado Springs and Scott really liked this set.  I was so-so about it, but I didn't see anything better.  We initially left undecided, and then I realized I'd rather have furniture than have no furniture.  Scott went back and ordered it.  At my insistence, he ordered it for delivery, which meant I didn't have to carry it and/or put it together.  I'm worthless when it comes to those kinds of things anyway.

The carpet before:


But before we had the furniture delivered on Christmas Eve, we needed new carpeting. So, between ordering the furniture on December 22nd and the delivery on the 24th, we had to rip up the old carpet and install a new one.  This meant moving all the old furniture down to the basement, etc.  The 23rd was a long day.  We went to Lowe's at 7am and bought 13 feet of Stainmaster carpeting right off the roll.  It was less than a dollar a square foot and they wanted $300 for installation(!).  Good thing Scott was planning on doing it himself anyway.  While we were there, we picked up boxes of laminate wood flooring for the basement also.  Scott ripped up the old carpet, put in the new one, and then (at my insistence again) replaced the ceiling fan.  The carpet removal and installation only took about 3 hours.

The old fan:


The people who used to live in this house subscribed to the theory that the ceiling fan should be painted the same color as the walls.  I hated that fan.  Like, REALLY hated that fan.

The carpet after:

That is just one big closet on the right, with two doors.

We still need to touch up some of the paint.  I decided I can live with the wall color now that the carpet isn't green.  When Scott took the trim off, a lot of the paint peeled.  Touch-up paint is on my list and I also am going to paint the trim antique white.

Carpet after:


New fan:

Lowe's for about $90.  I got two.  One for the guest room.  There is a cotton-candy unicorn fan in there.

The for-now finished product.  I still have some decorating to do.


I don't know why I'm using a blurry picture…

All in all, we are THRILLED with the results.  It looks like a completely different room and now we can use the old dressers (mine from Pennsylvania) in the guest room downstairs.  Plus, now we can actually fit all our clothes in these new ones.  A wonderful feeling.