Showing posts with label Crafty. Show all posts

January 2, 2020

A winter craft for kids

If you have some basic art supplies on hand, this is an easy craft!

I found this idea on Pinterest months ago, and made a shopping list for what I would need to make a few of these for grandparents.

Then, I came across Kate's blog post about these canvas handprints and thought, What a neat idea...to just make one for us each year too. 


So, after Christmas, Wells and I made this decoration to store away for next year. We made a Christmas tree, just like the ones I had wrapped up for his grandparents earlier in December. Next year, maybe a reindeer?

This can easily be made into a winter craft, not just a Christmas one. A toddler/kid hand as a snowflake would be really cute. I used finger paint so clean-up was really easy. (Which was helpful when the green jar fell and blood-spattered the kitchen.) The brushes were just Crayola kiddie paintbrushes I had leftover from another project.

So, if you're in the mood to craft with a kid (hahaha...never maybe?), this is an idea for these long winter days to come.

August 14, 2019

DIY Framed License Plate

I don't even know if that's a good title for this, but the picture speaks for itself.


Many military families keep their home state residency and keep their vehicles registered in that home state. Scott went all in with Alaska and I did too, I suppose. It wasn't permanent but it was our life. We've pretty much adopted the lifestyle and community of wherever we've lived. We've never actually lived on an army base. We just rent or buy off-post and kind of dig in to wherever we happen to be. I found this was especially true for me when it came to working and being a part of the local school district.

So when we moved to Alaska, we became Alaska residents and registered our vehicles with the state of Alaska. When we moved to Missouri and bought a new car and truck, we registered them with Missouri. When we moved to Colorado, we re-registered them with Colorado. When we sold the truck and bought a bigger truck in Wyoming, it was a Wyoming truck.

This means, basically, that we have a collection of license plates in a box and I'm going to do something crafty with them one day. Especially because Alaska has a multitude of different plates/designs/colors, so I have like three different ones from just there.

We bought our truck in Laramie in March 2018 and, did you know, that they register every single truck in that county with a number and our number was 867. Meaning, it was truck number #867 in Albany County.

In fact, when we tried to renew it, they wouldn't let us because we don't have active duty military orders to Wyoming any longer. They also asked if we could send the plates back. I'm pretty sure Scott told them where to go. Of course, Colorado wouldn't let us renew our trailers there either so it's probably not just a Wyoming policy.

So, we registered our truck with Alaska since we are residents there, and plan on also registering our SUV there when the time comes next year.

When Wells was born (at the only hospital) in Laramie, I asked how many babies they deliver each year (because I was pretty sure Ft. Carson was like 12 a day). They told me 250-300. Which means, there's probably less than a 1,000 babies born in Wyoming a year, I would guess. They are the state with the lowest population, after all.

I figured him having this Wyoming license plate was pretty unique, and it's a pretty unique-looking plate to begin with. I decided to craft it into something for his room.

(We actually have another plate too, because most states have a front and back plate, so we have doubles for our collection when I actually get around to displaying it.)

I googled "how to frame a license plate".


I bought a shadowbox frame and they were buy-one-get-one-free so now I need to make something else. 11x14 is the best bet for this dimension. I had to google "dimensions of license plate" when I was in Michael's and they're 6 x 12 inches, FYI.

I hot-glued the license plate to the back. This Wyoming plate was super light compared to other states' plates, so a basic craft hot glue gun might not work on every license plate.

Let it dry, maybe putting something heavy on top to seal it down for a few minutes.

The little circular mark is from the push pin it had in it originally. I'm hoping it just goes away. I was able to cover the other one with the plate.  

Put it back together.

For some reason, I thought this would be a lot more difficult than it was!


While this won't work for every military kid (you know, if you don't have a license plate), it's kind of a fun idea to pay a homage in some way to the state where they happened to be born.

 I feel like I'm going to be spending a lot of time collecting Wyoming-ish things for Wells!

June 30, 2014

How to Make Pinterest-worthy Moving Announcements

My friend gave us an adorable moving announcement months ago.  I don't know where she got the idea but it was cute and creative and like nothing I'd seen before.  I decided that for this move, I'd actually send out our address to friends and family.  I haven't done that since 2009. I put little slips of paper with our first address in Alaska into our wedding thank-you notes (that I hand-wrote myself and had mailed within 3 weeks of our wedding…I wrote them in the hotel rooms at night as we trekked our way up the Alaska-Canadian highway.  I'm very proud of this.)

But this move, I was going to get it right.  Never mind the fact that we'd been at two other addresses since then.  This time would be different.


You'll need:
Vellum paper (I found it on Amazon)
Colored paper or card stock
A pin or small hole-punch (I originally used a regular hole punch and the hole was too big for the fasteners)
Decorative paper fasteners
An editing program like PicMonkey
Envelopes (Mine came from a stationary pack I bought at Wal-Mart once upon a time)

I could do a fancy step by step tutorial but, let's face it, this is what the counter actually looked like as I was putting these together.


1.  Design your announcement on PicMonkey (or whatever program you choose to use).  I took a map outline from Google Images, and added some detail to it (that idea was what I definitely borrowed from the creative Kayla)

2.  Print it onto your vellum.

3.  Cut card stock to fit your envelopes.


4.  Cut your vellum to fit over your card stock.  It does not have to be perfect.  I did some wavy lines, rounded corners, etc, to make them look intentionally imperfect.  It's easier that way too.  I don't have a fancy paper-cropper.


5.  Poke a hole through the vellum and card stock with a pin and then add your paper fastener.

You may wonder why I've blacked-out the zip code. Well, the 7-1-9 has a billion zip codes.  
They're pretty specific to the address.

Done!  Truth be told, I had no idea where to find vellum paper. You can find it at Wal-Mart, but that's pretty hit or miss.  It's cheaper at Wal-Mart, but the quality of what I found on Amazon was better.
They had it at Michael's too, but it was about 50 cents per sheet.  I got a pack of 50 for $15 on Amazon.

This project probably cost $30, in addition to the envelopes that I had already.  However, you'd probably pay at least $30 to have professional moving announcements printed up, and now I have supplies left over for another project if I ever happen to feel crafty again.  (This doesn't happen very often.)

August 22, 2013

Lemon Cake Pops


Yesterday, I had a fun, crafty get-together with some friends.  We made these letters with our last initial.  It was very similar to the wreaths I was putting together last year (Which I'm planning on doing again this fall..which reminds me...anyone want to order a wreath? Custom-made!).  

Anyway.  What a great group of wives!  I'm so grateful to have found such a community here..and it seems like I meet someone new everyday.  It's a nice change of pace from the last year or so..when all my friends PCSed before we did. 


I made some cake pops to take along. I even went all out and used sticks.  In two years of making cake pops (i.e. cake balls), I've never used sticks.  There's a first time for everything.  


Lemon Cake Pops
makes approximately 4 dozen

1 Lemon Cake (from a mix), baked and cooled
1 can vanilla or cream cheese frosting
White candy melts
Sprinkles, for decorating 
Lollipop sticks (found in the cake decorating section of Wal-Mart)

After baking your cake according to the package directions, allow to cool completely.
In a large pan, crumble the cake and mix in the frosting (I also added a teaspoon of freshly grated lemon zest.) You will have one big sticky mess. 

Refrigerate for a few hours so the mixture will firm up and be easier to roll. (You can skip this step if you're in a time crunch.)

Roll into 1-inch balls and place in a covered pan in the refrigerator or freezer for a few hours or over night.

 Melt the candy melts in the microwave.  Do this at 30 second intervals, stirring in between.  It usually take a minute or two.  Put a stick into each cake ball, and then dip in the candy melts.  I thought the yellow was pretty so I didn't cover it the whole way.  Add the sprinkles immediately. Allow to dry/cool on wax paper.  I like to store them in the fridge or freezer because I think they taste better cold.

August 14, 2013

Facts


Fact:  How we punish the dog. He got in trouble for biting.  Next time, we zip up the top too.


 Fact: This is my favorite shirt.  I bought it on a street corner in Boston 3 years ago.  I always get asked if I went to Harvard when I wear it.  My favorite time (and I tweeted about it last year) was when I was in the PX buying a $5 bottle of moscato and someone asked me if I went to Harvard.  My immediate thought was, "I would not be an elementary teacher buying a $5 bottle of wine on a Saturday afternoon if I had gone to Harvard."

Fact: The humidity is evident on my camera lens.  This picture is edited within an inch of its life.
Shorts: Express (via Marshall's), Sweater: Macy's (old), Sandals: Old Navy

Fact: A search term from last week:  "side swept bangs on five head".

Awesome.

Also, "ryan gosling haircut".

I did one Ryan Gosling post a year and a half ago (one of those Hey, Teacher things) and every time I look at my search terms, his name is in there.  I've gotten used to seeing it, but perhaps the oddity of it has been lost on me.  That's REALLY weird.  Just thought I'd share.

Fact: 97 (NINETY-SEVEN) people have found my blog by searching "ryan gosling".  That is strange.

Fact:  I found this skirt tutorial that I'd forgotten about from last fall.  I'd wanted one.  But I can't sew.  Also, there are no fabric stores around here.  Scott is usually pretty busy.  I'm surrounded by roadblocks, as you can see.  I think, as soon as the flood waters subside, I'm going to make my way to a store (a real one), buy some fabric, and then beg Scott to help me.  Wish me luck.

Sharing at: WIWW, Random Wednesday, Walkabout Wednesday

January 31, 2013

Valentine's Day Bunting

I had grand, grand plans to make a Valentine's Day wreath.

Then, in my "pack up ALL the stuff because we're outta here in 3 months" frenzy, I misplaced my glue gun.  All the boxes looked so neat and orderly.   I didn't want to disturb them.

So I took my 8 sheets of felt and made this instead.

I did have to open a box to find some yarn.

You win some, you lose some, I guess.  Those wreaths actually take a really long time.  This decoration took less than an hour from start to finish.


I love doing projects with felt because it's so darn cheap.  Any cute, inexpensive crafts I should try??  Remember, no sewing machine, please :)

January 16, 2013

Daylight

In a rare miracle of sorts, school was canceled the other day.  Alaska is strange in that they cancel school when it's too warm (something about melting and re-freezing....I don't really pay attention.)

-9*?  Get outside, kids.   44*?  Cancel school.

Whatever.  I've stopped trying to understand this place.

However, it meant I got a day off.

I got up early, vacuumed, prepared some stuff for dinner, went to the gym, blogged/tweeted a bit, took a shower, went sneaker-shopping, did some online shopping, watched some re-runs, read a book.

Wasn't an awful day.  I mean, I can see how it would get pretty boring, pretty quickly.  Scott's right.  A job suits me.

Katie's DIY Heart Sweater tutorial here
What doesn't suit me is leaving the house in the dark and returning home in the dark.

Since the rare opportunity for daylight presented itself on Monday, I got dressed.

You're welcome.


Sweater: Target clearance // Jeans*: JCP // Boots:  Steve Madden // Watch: Fossil

*Why yes, I do own only 2 pairs of jeans.  It's either ^these or these.

December 23, 2012

Allie @A Day in a Joyful Life: Invitation Ornament

Today, I'm going to look like a real craft blogger.  Because Allie is here with a tutorial.  She labeled stuff for you and everything.  
Thank you, Allie!  
I'm going to try this with one of our wedding invitations!  
(Hot pink will look good on a Christmas tree, right?)


Hey Kristin's kNook readers! I'm Allie, and I blog over at A Day in A Joyful Life. You may know me and my blog from The Great Pumpkin Swap that Kristin and I co-hosted awhile back. Today I'm going to try to prove I'm more than a swapaholic-- I occasionally craft. 
Between work and life I barely find time to do crafting, but I do love it. 
I put this particular craft together after my own wedding last year because I wanted to commemorate our first Christmas as a married couple. You've probably seen similar ideas floating around the Internet, but I came up with this idea when I saw the clear ball ornaments at Michael's, so I call it my own. It's super easy, and a great idea for a gift for any newlywed couples in your life, or really anyone who had a special occasion involving an invitation! This is my first tutorial, so please be patient with me. A big shout out to my husband for taking the pictures, and a tip to anyone who does a hand-heavy photo shoot: take a few minutes to remove the chipped nail polish before you begin.
Add some solid color paper in there, and any other adornments that suit your fancy-- for this one I punched out some small leaves and tossed them in since this was a fall wedding. Finally, add some ribbon to hang and you have a gorgeous ornament that the happy couple will cherish for many years. 
{I apologize for the semi-blurry pics of the finished product-- my camera skills at their finest, people.}
I hope you find this simple but meaningful little craft useful! Thanks to Kristin for having me on the blog, I hope all of you stop by and see me sometime! Have a Merry Christmas and a happy holiday season! 

December 20, 2012

Holiday Glitter Canvas: Casey

I've got another teacher blog-friend!  Sometimes I wish I could teach with my teacher-blog-friends.  I like them.  Aside from starting off with a completely ridiculous statement, Casey is going to share a fun craft with you.  And by "fun craft" I don't mean that peppermint tray thingy that I saw on Pinterest a few weeks ago and just kinda assumed wouldn't work anyway.   (Try the glitter thing instead.)
Thanks for stopping by, Casey!


I kind of feel like I don't belong here. I mean, Kristin is like the real deal when it comes to blogging. Thank you, Kristin, for letting me guest post for you today.
I'm Casey and you can usually find me over at Everyday Adventures, where I blog about teaching (middle school), my fur babies, crafts and whatever else comes into my head.

You should know one thing about me: I love Christmas. I love everything about it. I love Christmas music. I love eggnog. I love wrapping presents. I love Christmas trees. And I LOVE decorating for Christmas. Usually I wait until we come home from Thanksgiving dinner to start decorating. Usually. This year I started a couple days early. As much as I love decorating for Christmas, I don't love spending tons of money on decorations. Luckily for me, I am a fan of DIY so of course I am a fan of Pinterest. This is a tale of two holiday crafts.

I don't mean to toot my own horn, but I am pretty crafty. I can usually look at something and figure out how to create a version of it with what I have. When I came across this pin, and it had the worlds easiest directions with it, I knew I had to try it.

Turn mints into a serving tray!  Just arrange on a cookie sheet lined with parchment paper, and bake at 350 for 8-10 minutes. Then let completely cool at room temperature.  After your party, break and keep in a candy jar!  Great idea for a plate of cookies you don't have to get back. Love this for delivering Christmas cookies.
Pinned via here
So cute right? The directions said to unwrap the peppermint and arrange them on a cookie sheet lined with parchment. Pop them into a 350 degree oven for 8-10 minutes and viola! You get the cutest tray for a cookie exchange or for appetizers at a holiday party. 

I followed those directions and after 10 minutes, not much had happened. I checked again at the 13 minute mark, and again at 15 minutes. At 17 minutes it started to look like something was going to happen. 2 minutes later I got this:
I believe we can call this a Pinterest Fail.

When it cooled down, it was almost impossible to get off the parchment and when I did free it, it broke into several pieces. Boo.

Don't worry, not all my holiday crafts were disastrous this year. Here is a super easy craft that makes a huge impact on my wall decorations.


Take a blank canvas. Draw on an outline of a shape. (You could print out a template or free hand it. I traced a cereal bowl). Cover shape in glue. My first grade teacher said never make glue soup. Mrs. Rau, you were wrong. This is a time for glue soup. Cover glue with glitter. Let it dry. Overnight. Glue soup takes a long time to dry. I promise.

Even with the "dripping" I still love how it turned out. Once I put it on my mantle (and placed it strategically behind some garland) you can't even tell!

There are a ton of these posted all over blog land right now, and I love seeing how different they all are.

I will leave you with this. I feel it is only fitting since Kristin usually finds the funniest things on the Internet. (I mean, she has like a gift or something)
Glitter, the herpes of the craft world...(*AHAHAHA... and in my bra.... my hair... on my cat... my husband... my sofa.. the floor.. across the room.... -Mel*)
Pinned

Glitter: The herpes of arts and crafts; it's never truly gone, and when the sun's out there's a flare up
Pinned
(I do love me a GoT reference -Kristin)

December 17, 2012

DIY Heart Sweater: Katie from For Lauren and Lauren

I'm thrilled to have Katie on the blog today.  

forlaurenandlauren

I don't even remember how I "met" her, but I love her! (Who but a blogger could utter that phrase??)
She's a bargain shopper, a crafter, and a teacher.  I never miss a post from her!
While I often scoff at "crafts" that require a sewing machine, this adorable sweater is something I may have to attempt.  And, yeah, I'll totally hand-sew it.

I'm so happy to be sharing on Kristin's blog today.  My name is Katie and I blog at for Lauren and Lauren. Kristin in one of the first bloggers I've met and I'm so glad I did!  I may not be envious of her living in Alaska but am envious of the delicious desserts she is always making. I've stolen many recipes from her!  

I started my blog for my sister Lauren and sister-in-law Lauren because they convinced me to share my daily outfits with them.  Now my blog has become a place to not only share my cheap clothing finds, but also projects I make, recipes I attempt and what is happening in my life.  

Speaking of finding cheap clothing, I rarely spend a lot of money on one clothing item.  And when I saw those adorable heart sweaters from J.Crew last year I knew I would never spend $80 on one, so I decided to make my own.  It was super easy and cost me less than $8. 


I found this grey sweater for $7 and a black piece of felt for $0.50.  


I cut a heart out of paper first and then out of the black felt.  
Then I pinned the felt onto the sweater. 
(I tried it on first to make sure that is where I wanted it.) 


I used my sewing machine to sew it on. 
(I know Kristin says she doesn't sew and if you don't either you could definitely hand sew it on!)
And that is it! 
So happy to have spent less than $8 rather than $80!


Feel free to come visit me. I LOVE meeting new bloggers. 
Thanks, Kristin, for having me on your blog!

December 13, 2012

Holiday Crafts: Meg from borrowed heaven

Today, I'm really happy to be able to share some Christmas crafts with you.  Christmas crafts that I totally didn't make...which means they are even easier to share.  Meg put together tutorials (something I do not do) so my readers can get a taste of craftiness for once.  Thank you, Meg!  I'd love to give all 3 of these a whirl.

Hi everyone, my name is Meg and I blog over at borrowed heaven.
borrowed heaven
I really started blogging around last Christmas because I loved the idea of sharing holiday favorites [before I ever heard about pinterest].  I have loved Christmas my whole life, it was a really big deal in my small family when I was growing up.  We put up all of our decorations the day after Thanksgiving, and my dad and I always begged to keep everything up until Martin Luther King, Jr. Day.

I thought I would share with you three of my favorite parts of my family's Christmas - homemade Christmas: gifts, tree ornaments, and cookies.

Homemade Christmas Gift: Winter Evergreen Arrangements/ Centerpieces
My mom made one of these each year for our centerpiece.  When I was in high school [and didn't have a lot of money] I started making these for family members and family friends as presents.  They loved them and I have given them as gifts every year.

What you need: small festive basket/planter, oasis, evergreen branches [pine, spruce, fir, holly - anything you can find in your yard], small Christmas ornaments, wood floral picks, spray glitter, knife, and scissors

Here's what you do:
- Cut the oasis so that it fits snugly in the small planter.  It can stay its square shape.  It should stick up a few inches above the top of the planter so that you have room to arrange everything.
- Wet the oasis, but not to the point of soaking and put it in the planter.
- Cut your evergreen branches into a few small pieces.  It is best to stick each piece straight into the center of the oasis so that it can absorb the water.  Also, try not to stick in and take out the evergreen pieces too many times, the oasis permanently forms to each piece, and it's important to have a snug fit.
- Follow the photo pattern below: Start by arranging along the edge of the planter with different types of evergreen, then all around the top.  Make sure you look at the arrangement from different angles [top, bottom, all sides] to make sure you can't see any oasis.
- Use the wire on the wood picks to attach the ornaments to them.  Put these into the oasis last.  These work great to cover any large holes in the oasis and give color.
- If any of your evergreen pieces stick out too far, don't be afraid to trim them back.
- Finish will a little spray glitter.
- Don't forget to water it every few days to keep it green throughout the holiday season.  You can even take out the ornaments and add snowflakes or hearts to keep it through the whole winter!


Homemade Christmas Tree Ornament: Cinnamon Ornaments
Every Christmas when I was young, my mom and I made these for our Christmas tree.  They smell WONDERFUL.  My mom let me pick out 1 or 2 new cookie cutters each year, so you can imagine how many we have.  I haven't made them in probably 8 years, but I thought it would be fun to use them as gift tags this year, so I will be adding names to them after I bake them.

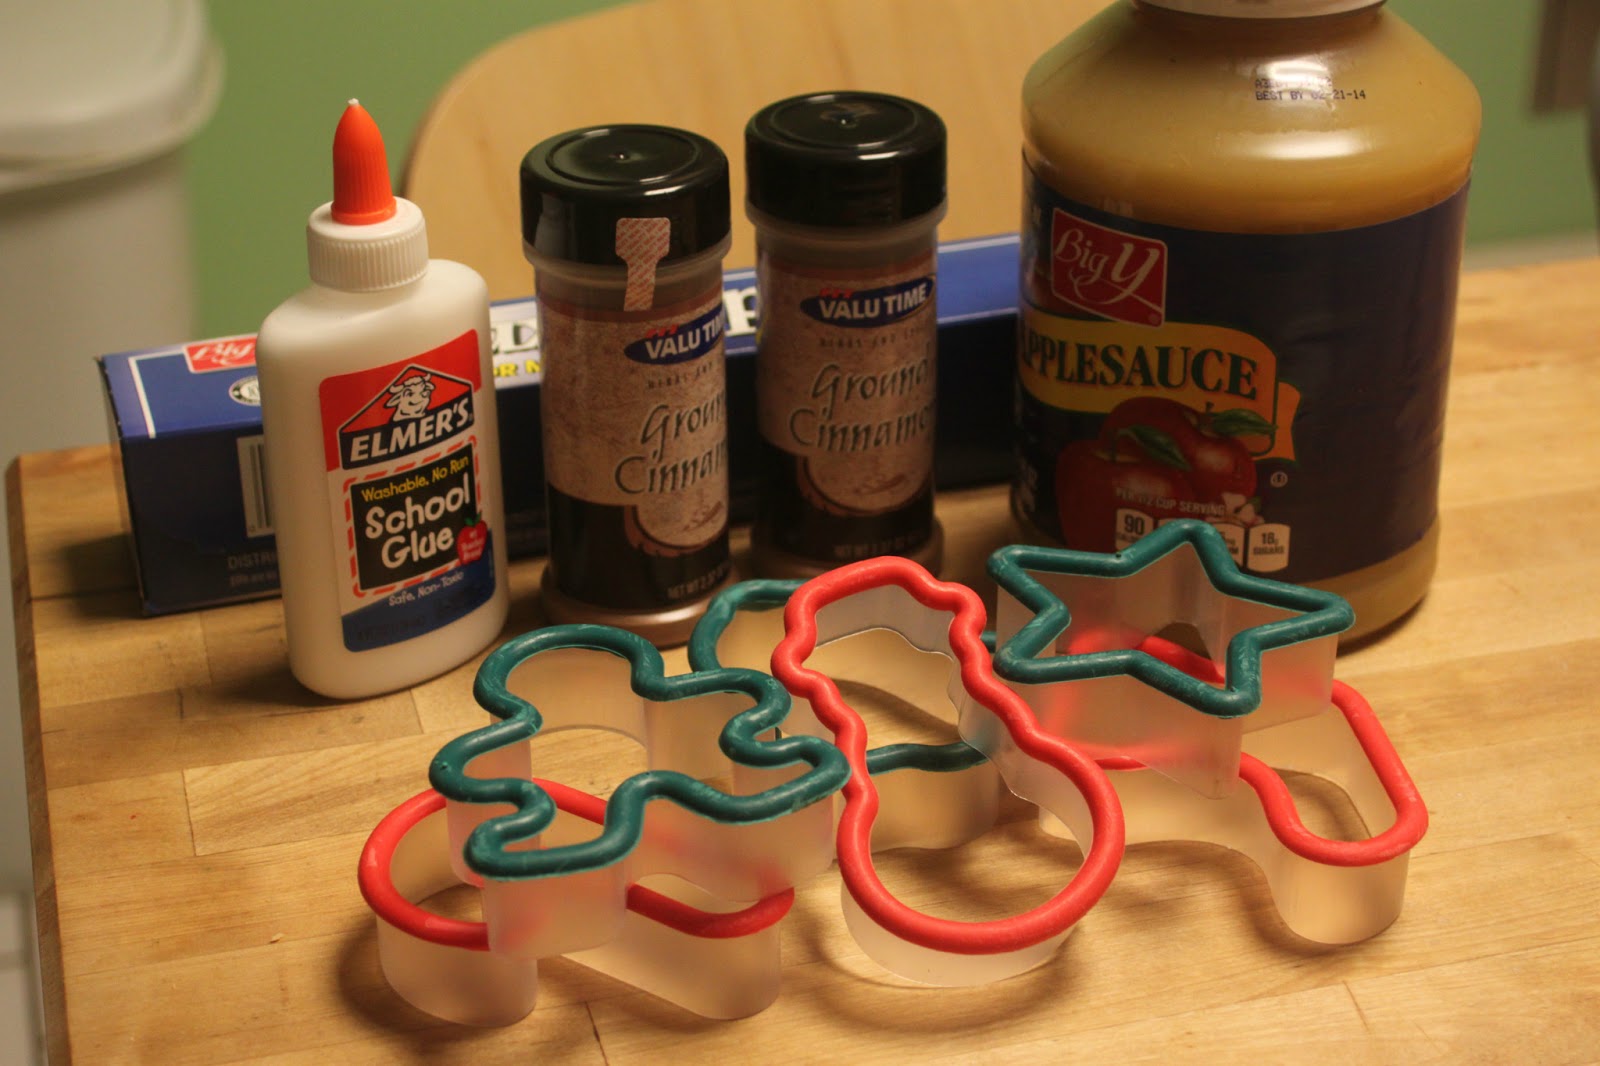
What you need: 1 cup applesauce, 5 oz ground cinnamon [and a little extra to keep dough from sticking], 2 tablespoons of Elmer's glue, cookie cutters, a rolling pin, wax paper, a straw

Here's what you do:
- Preheat the oven to 200 degrees.
- Combine applesauce, cinnamon, and glue in a large bowl.  Mix with a wooden spoon or your hands.  It should form a pretty solid dough ball.  
- Put a piece of wax paper down and spread a little bit of cinnamon on it to keep the dough from sticking [like with flour for baking].
- Put the dough ball on the wax paper and cover with more cinnamon and another sheet of wax paper
- Roll it out until it's about the thickness of a straw.
- Cut as many shapes out of it as possible.
- Keep rolling and cutting until all the dough is used up.
- Put the ornaments on a wax paper lined baking sheet.
- Use the straw to cut holes for string to hang the ornaments after they're done baking.
- Bake the ornaments on the wax paper for an hour, then remove the wax paper and bake for another hour and a half [all on the same side].
- You will know they're done when they are no longer dough-y on the bottom.


Homemade Christmas Cookie: Chocolate Covered Shortbread
My mom's "cookie tray" is world famous.  Each Christmas, she doesn't make any pies or cakes, but she makes over 10 types of cookies: chocolate chip, oatmeal, fig filled, italian, fudge, peanut butter squares, jelly, but her shortbread has always been my favorite.

What you need: 1/2 pound butter, 1/2 cup confectionary sugar, pinch of salt, 2 cups flour, few cups of chocolate chips, 1 tablespoon Crisco, sprinkles

Here's what you do:
- Combine flour, salt, sugar and butter in a large bowl.  Mix completely on medium.
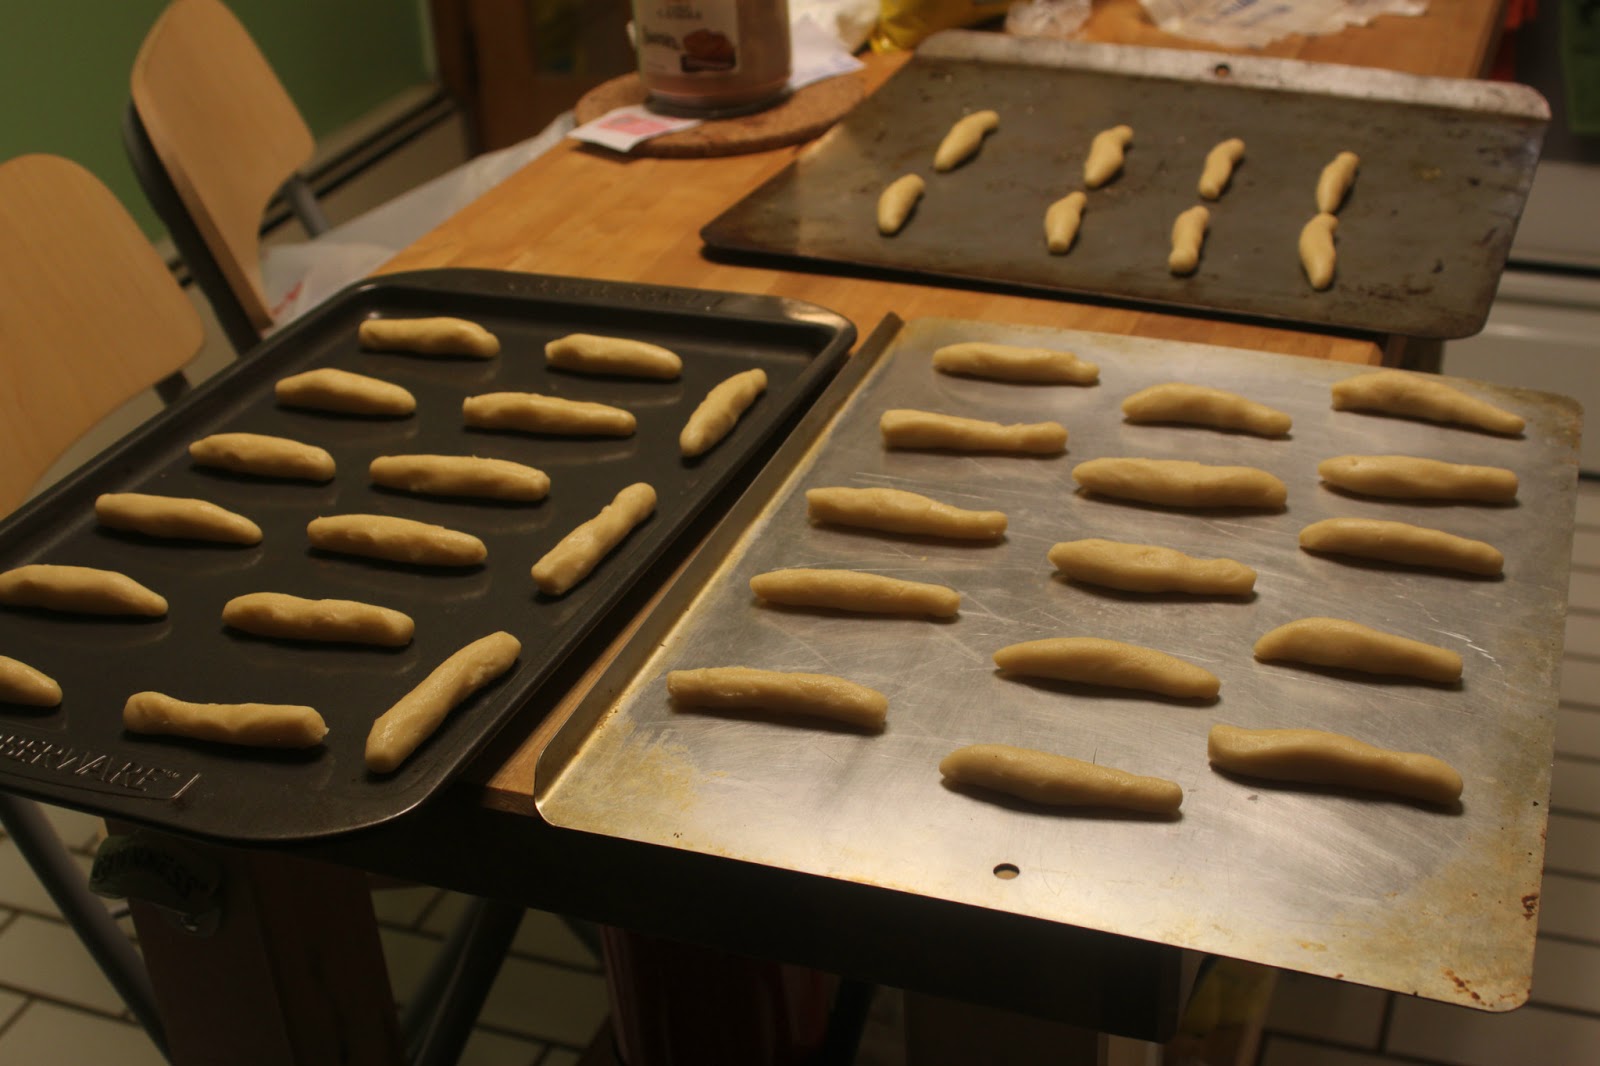
- Roll into dough ball and then into individual sticks.
- Place cookies on cookie sheet and put in refrigerator for 2 hours until hardened.
-  Preheat oven to 325 degrees and bake for 12 to 15 minutes.
- Let cool completely.
- Melt 3 cups of chocolate chips and about a tablespoon of Crisco together in the microwave on medium until smooth.  Check it and stir every 30 or so seconds.
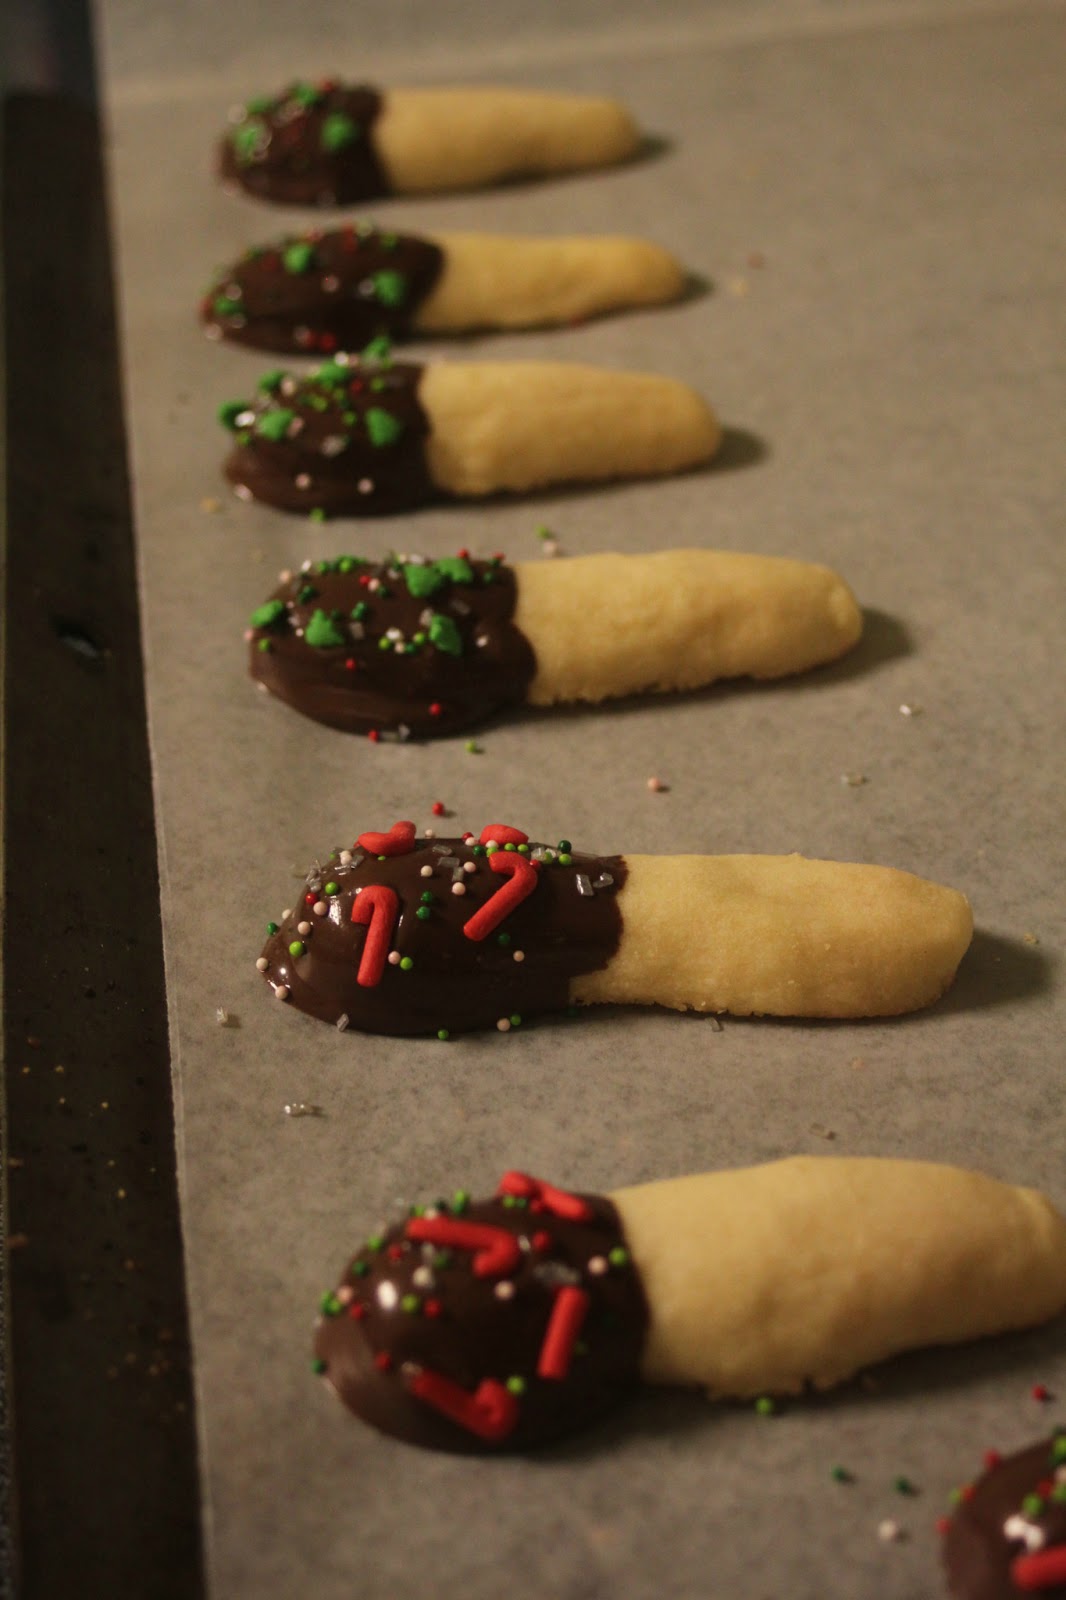
- Dip shortbread cookies halfway into chocolate and place back on cookie sheet.
- Decorate with festive sprinkles and refrigerate until chocolate is hard.


Thanks for checking out my Christmas favorites - please stop by my blog for more baking/diy/renovation/adventure ideas and posts!  Thank you so much to Kristin for allowing me to guest post!