Showing posts with label Candy. Show all posts

April 20, 2014

Leftover-Easter-Candy Rice Krispy Treats

I actually bought little to no Easter candy this year.


I didn't really see the need because we don't do Easter baskets.  We're adults.  We buy candy whenever we want.  Case in point: We have made our way through approximately half a dozen bags of carrot cake M&Ms in the last month.  These things…I just don't have the ability to stop eating them.  

Since I wasn't going to make a whole fancy dessert to go with our super fancy (no) Easter dinner of chicken, sugar snap peas, and corn on the cob, I decided to just chop up the remnants of the (currently open) bag and put together my treat of choice.  

I like that you can do this with ANY leftover candy.  I'm assuming you have extra bags or baskets of candy laying around; Whoppers/Robin Eggs, Mini Cadbury eggs, chop up Reeses' eggs, or even chop up your chocolate bunnies!  It'll all work!  
And then take the tray of Rice Krispy treats to work and leave them in the lounge or break room.  I'd do that, but that doesn't happen here.  I recommend it though, if you're using this as a way to get candy out of your visual path.


Leftover-Easter-Candy Rice Krispy Treats
makes a 8x8 or 9x13 pan

1 cup chopped Easter candy (I used M&Ms)
1/2 cup sweetened coconut (because I had it in the cupboard)
1 10-oz bag mini marshmallows
4 T. butter
1 t. vanilla
6 cups Rice Krispy cereal

In a large saucepan, melt the butter.  Stir in the, coconut, vanilla, and mini marshmallows. 
Mix well until the marshmallows have melted. 

Fold in the cereal until it's all covered with the marshmallow mixture.  Remove from heat.

Fold in the candy at this point so it doesn't melt.

Spread into an 8x8 pan for thick bars or a 9x13 pan for thinner ones.

January 1, 2014

Homemade Candy Bars

Just like last year and the one before, I'm starting off the new year with a dessert!

Happy New Year!  And God bless you if you have to go back to work tomorrow.  I've got a few more days off…

I'm not really sure what to call these, other than candy bars.  The recipe says "Kit Kats".  They do not taste like Kit Kats.  They have more of of Twix-texture.  But, again, not really.

My mom made these for the first time in 2011.  If you recall (you probably don't), 2011 was the Christmas I spent at home just taking up space while Scott was in Afghanistan.  I took a nice picture of them, and then meant to share with you.  I didn't.

Last year, she made them again.  Still, I didn't share.  Probably because I showed up in Pennsylvania after our Carnival cruise with a 102* fever and the chills.  I wasn't in a baking mood that week.

However, I have been holding out on you.


These are a unique treat to make for just about any occasion..my mom just happens to insist on them at Christmas.  This year marks the third that I have helped make them.

The middle layers are kind of like a caramel/toffee, and I think a sprinkling of sea salt over the top would make them super rich.

Okay, and maybe a drizzle of salted caramel sauce.  Yep.  That'd be good too.


Homemade Candy Bars
makes a 9x13 pan
adapted from a recipe by Ruth Corle (and my mom said she saw it in an old Grange cookbook too)

1 box Club crackers (90 crackers)
1 cup (2 sticks) butter
1/2 cup milk
2 cups graham cracker crumbs
1 cup packed brown sugar
1/3 cup white sugar
1 t. vanilla
3/4 cup peanut butter
3/4 cup chocolate chips
3/4 cup butterscotch chips
Optional: sea salt for sprinkling on the top

Line the bottom of the ungreased pan with Club crackers (you'll use 30).

In a saucepan, combine butter, milk, graham cracker crumbs, sugars, and vanilla.  Bring to a boil over medium heat.  Boil, stirring constantly, for 5 minutes.  Set a timer!  Then, remove from heat.  Pour half of the sugar mixture over the crackers in the pan.  Add another layer of crackers (30).  Pour the rest of the sugar mixture over that layer.  Add your last layer of 30 crackers.

In a small saucepan, melt the chocolate chips, butterscotch chips, and peanut butter.  Stir until completely smooth.  Pour over the last layer of crackers.  Sprinkle with sea salt if desired.

Place the pan in the fridge to set up for at least 12 hours.  Cut into bars and enjoy!

October 6, 2013

Reeses' Ice Cream Cake

I posted this recipe 2 1/2 years ago (dear Lord, has it been that long?), but Scott made it two weekends ago and I thought it might be nice to share again.  It's our #1 go-to dessert. 

I apologize that THIS is the only picture I have.  You see, Scott made it to take to a friend's birthday dinner. I knew better than to ask if I could cut it before we left the house.  A cross-section picture of this beautiful layered dessert would be a nice addition here, don't you think?  I guess we'll never know.


Chocolate Peanut Butter Ice Cream Cake

1/2 gallon (1.5 quarts) peanut butter ice cream, softened
1 container of Cool Whip
1/4 cup of peanut butter
1 bag of Reeses' miniatures, crushed 
1 package of Peanut Butter Oreos, crushed
2 T. melted butter
Hot fudge, for drizzling (Reeses' Peanut Butter syrup also works well for this if you can find it)

Crush the Oreos using a Ziploc bag and a pot or rolling pin.  Mix them with the melted butter and press into the bottom of an 13x9 pan.  Freeze for 20 minutes.

In a mixing bowl, stir together the softened ice cream and Cool Whip. Stir in the peanut butter.

Pour the softened ice cream mixture into the pan.  Freeze for another 20-30 minutes.

Crush the Reeses' cups and melt the hot fudge.

Drizzle the fudge and sprinkle the crushed Reeses' cups over the cake.  Freeze for another 20 minutes (..or actually for as long as you'd like.)

August 23, 2013

Friday Facts.

1.  Some recent search terms.

 That's okay with me.

2.  I've gone pillow crazy.  I went shopping with a friend last weekend.  Between the two of us, we came home with 6 pillows.
I got these two teal ones to match the rest of the Tiffany Blue theme I seem to have going.


3.  I love candy corn.  I can't get enough of it.  I'm getting antsy and annoyed because I can't find it on all the store shelves yet.  I found this bag at a grocery store 45 minutes away.  It lasted 2 1/2 days.
I'm getting concerned about what I'll do without a Target and Fred Meyer down the street.  That was how I used to fill my candy corn requirements during the fall season.

4.  I won credit to LaMaLu Boutique in Life of Meg's giveaway last week.  I got this necklace and I love it.  I'm not a fan of statement necklaces (too heavy) and this barely qualifies as one...so it's perfect for me!  Thanks Lauren and Meg!


5.  You may be able to see some lint/hair in that picture.  I had to lint-roll myself before I left the house in this outfit.

Shirt: Target // Shorts and sandals: Old Navy

...because someone is starting to shed a bit.

Happy Friday!


July 3, 2013

Chocolate Payday Bars (Copycat recipe)

If you are in need of a sweet treat for the 4th of July tomorrow, read on:


This is probably just glorified fudge.  It really does have the texture of a candy bar though.  Super chewy, salty, sweet...you won't be able to eat just one.  I averaged three a day while that bagful sat in the freezer.  They're not too chocolatey, and the sea salt really balances out the sweetness of that liquid gold, also known as sweetened condensed milk.

These "candy bars" are gluten-free, and I originally made them because I saw a yummy looking gluten-free recipe on Pinterest but didn't have all the ingredients.  This is my adaption.  We were going to a dinner at a friend's house, but one of our friends has to eat gluten-free.  Turns out, as usual, we'd all brought a dessert.  Completely overkill, but good for me:  We took most of these home.  I can't complain about that.


Chocolate Payday Bars
makes a 9x13 pan
adapted from this recipe

2 cups peanuts, separated (I used dry roasted but honey roasted would be great.)
2 T. butter
3/4 cup peanut butter
1 can sweetened condensed milk
1 t. vanilla
2 cups mini marshmallows
1 t. sea salt
1/2 cup chocolate chips
1/2 cup white chocolate chips

Line a 9x13 pan with foil.  Spread 1 1/2 cups of peanuts into the bottom of the pan.

In a saucepan, melt the butter.  Add in the peanut butter, chocolate chips, sweetened condensed milk, and vanilla.  Stir well to combine over medium heat.  When the mixture is smooth, add in the marshmallows and let them melt, turning off the heat. Stir well.

Spread into the pan evenly over top of the layer of peanuts.  Sprinkle the top with sea salt and then with the rest of the peanuts.  Refrigerate or freeze for a few hours, and cut into bars.  Store in the fridge or freezer.

Note:  I kept them in the freezer in a Ziploc bag and the longer they were in there, the better they tasted.  Don't skip the sea salt!  It's the best part!

April 19, 2013

5 Friday Things.

Skirt/leggings:  Old Navy // Sweater:  Target
1.  I wish this picture showed how poofy this skirt really is.  I'm glad it's all springy outside so I can wear it again.  (Springy means the snow is melting.)

2.  Love these Old Navy leggings.  They're really good for Pilates, but I have trouble doing cardio in anything other than shorts.


3.  I ate sour patch kids for lunch on Tuesday.  SOUR PATCH KIDS.  And there were children watching me.  That was the low point of the week.


4.  I went to the dentist on Wednesday.  Said my teeth look great.  That's odd.  I eat a lot of candy (see #3).  Maybe "great" doesn't mean what it used to?


5.  This is wonderful.  Loading it on up today!  Hope you're ready for nostalgic* Alaska posts next week.  

*Does 'nostalgic' mean the same thing as 'sarcastic'?  It doesn't?  Oh well.


December 7, 2012

Christmas Dessert Round-Up

Looking through my dessert posts from last December makes me feel like I was trying to be an overachiever of sorts.

This December, no Christmas treats have been made.  I'm okay with that.  And so are my pants.

Or should I say, my shorts.  Because, friends, I'll be in shorts this weekend.  I better be anyway.  I tell you, we'll need to locate to the Equator after this Alaska stint.

Chocolate Peppermint Cake Pops.


Hershey Christmas Bark.

Cranberry Eggnog Cake Pops.


My favorite Christmas cookie:  Apricot Squares.


My favorite fudge:  Peppermint Fudge.


White Chocolate Chip Mocha Cookies.

Peppermint Brownies.

Salted Chocolate Walnut Fudge.

Soft Sugar Cookies.

Hershey's Kiss Cookies.

Oreo Peppermint Creams. (Oy.  You should make them.)


Eggnog Bread. (It tastes like a giant sugar cookie.)

Eggnog Snickerdoodles.  (Went a little eggnog-crazy back in twenty-ten.)


November 9, 2012

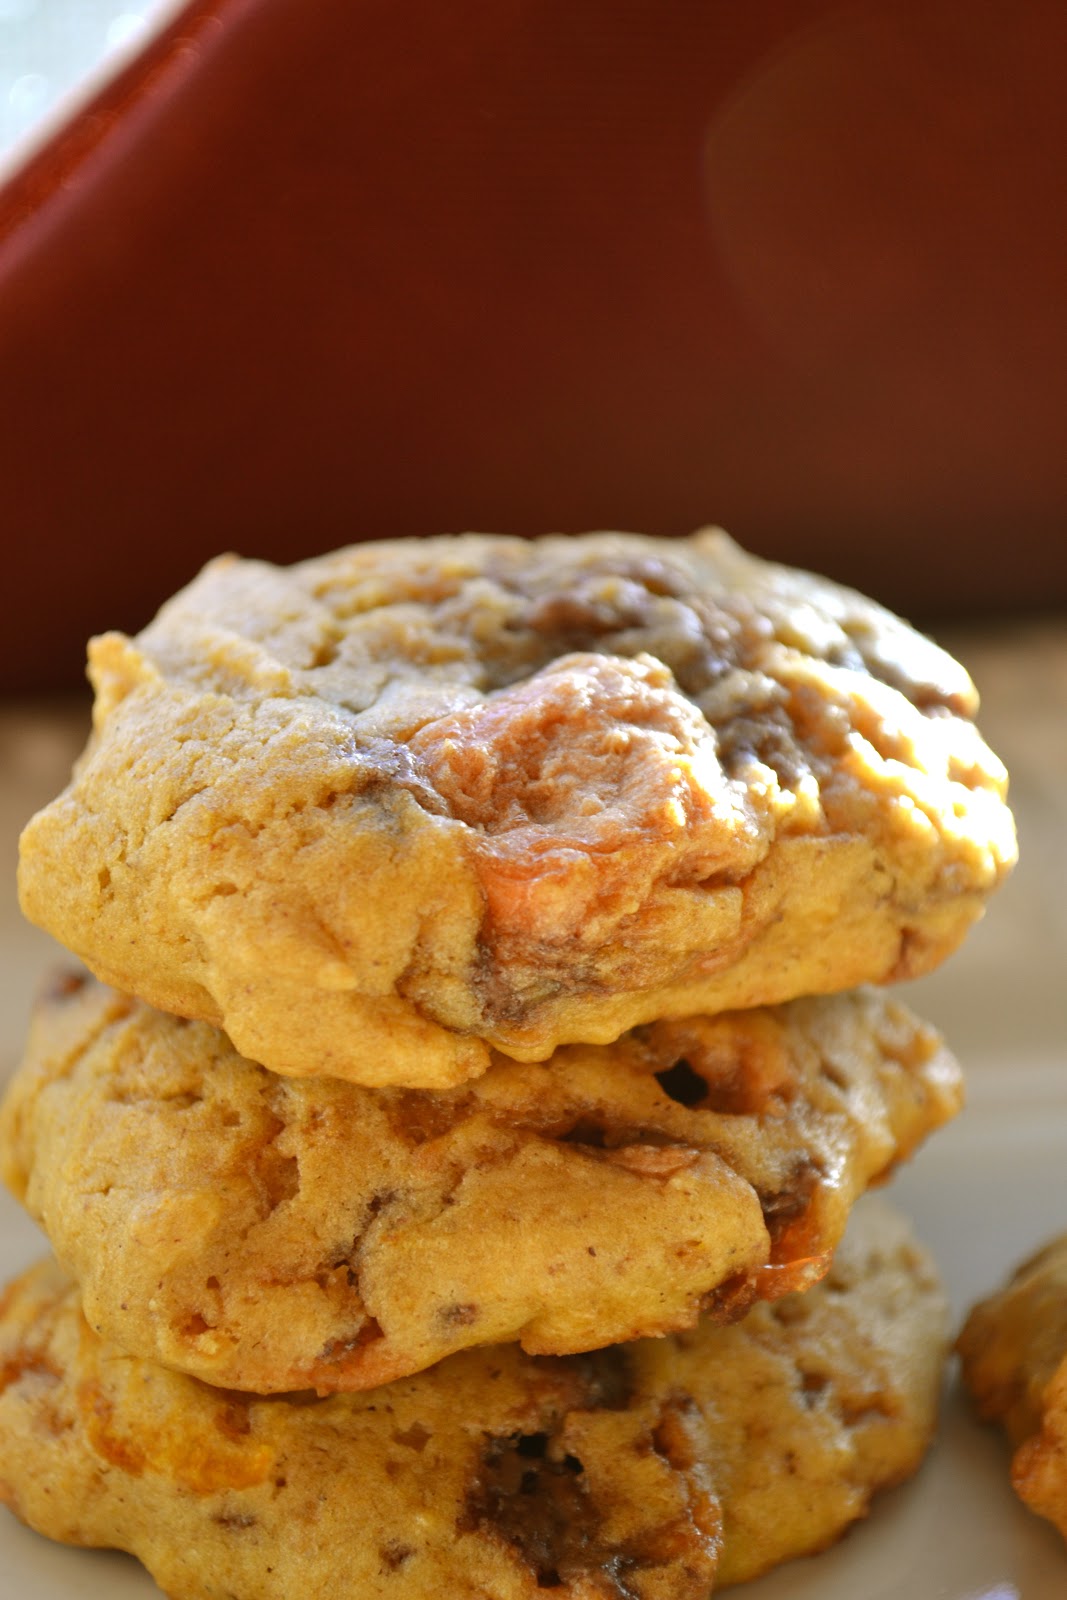
Pumpkin Butterfinger Cookies and Great Pumpkin Swap Reveal

Today's the day to link on up, Great Pumpkin Swappers!

Scroll to the bottom to do so!

But first.  A cookie.


Jessica, my swap partner, inspired me to make these cookies because she told me her favorite Halloween candy was Butterfingers.

So I sent her some Butterfingers.  While I was at the store getting the Butterfingers, I knew I had to do something creative with them.

Maybe it was whatever-dormant-part-of-my-brain-that-used-to-think-as-a-food-blogger that was speaking to me.


So I took my Pumpkin Cookie recipe and threw in some chopped up Butterfingers.  Then, I sent Jessica some Butterfingers and a few cookies.  The rest?  I took to work.  They were gone before lunchtime.  It's at moments like those in which I am truly thankful for a job.

I cannot be trusted with 3-4 dozen cookies.  If you are someone who CAN be trusted with 3-4 dozen cookies, I probably wouldn't like you anyway.


The best kind of people are the ones can't be trusted with cookies.

Pumpkin Butterfinger Cookies
makes 3-4 dozen, depending on size

1/2 cup (1 stick) butter
1 1/2 cups brown sugar
2 eggs
1 cup canned pumpkin
1 t. vanilla

2 1/2 cups flour
3 t. baking POWDER
1 t. salt
1 1/2 t. pumpkin pie spice
1/4 t. ginger

8 fun size Butterfingers, chopped (or 2-3 regular bars)

Cream the butter and sugar together.  Add in the pumpkin, eggs, and vanilla.  Mix well.

Mix all of the dry ingredients, minus the Butterfingers, together in a bowl (sifting is suggested, but I usually don't).  Add the dry mixture to the wet mixture in three batches while mixing at a low speed and scraping down the sides of the bowl.

Fold in the Butterfinger pieces.

Dollop onto a greased cookie sheet and bake at 375 degrees for 10-14 minutes.  They should be just starting to brown when you pull them out.

-------------------------------------------------------------------
So.

Here's a sneak peek at what I sent Jessica. 
Is that mug not the most adorable thing you've ever seen?


Here's the part where I would share what Jessica sent me.

But I haven't gotten it yet.
{{EDIT}}

I got my box from Jessica in the mail!
Here's the cute goodies she sent me:

Those gloves?  Just what I need.  I'm quite excited to not have my fingers freeze off when I try to use my phone out of doors.


Thanks Jessica! And thank you to everyone who took part in our swap!  

September 18, 2012

Me, Myself, and I and Instagram


1.  When you're feeling down, what do you do to pick yourself up?
I watch re-runs of my favorite shows.  True Blood and Dexter have the ability to make me forget any  problems.  There's a reason why I watch the shows I do.
Oh and I drink water, get in a 5 mile run, eat vegetables, and get plenty of sleep.
False.  I do not do those things.  I eat candy.

2.  If you had to live in a different time period, which would you prefer?
I belong on Little House on the Prairie.  There's no question about it.  However, I'd probably die if you told me I could only take a bath once a week, could not have access to technology, and had to eat mush and salt pork.
But other than that, I'd love a good calico dress.

3.  What's the most creative Halloween costume you've ever worn?
None.  I was a witch, a devil, or a cat for all of elementary school.  I did not participate in the "let's dress up like a prostitute and call it Halloween" phase many girls went through in college.
In fact, if I remember to order my Merlotte's t-shirt (chances are that I'll forget), wearing a t-shirt and ponytail will make this my most creative Halloween ever.

4.  Five weird things about you that we wouldn't know without being told.
...I can never eat a whole piece of gum at once. I break it into 3 pieces so it's smaller to manage. And if I don't pay attention to what I'm doing, I start chomping too.  I don't know that I chomp, but hearing other people chomp gum doesn't bother me at all, so I figure I probably do it too.

..I have my children's names picked out.  I've even gotten Scott to agree to some of them.  I don't share them because I truly believe other girls will steal them.  (I'm suspicious like that.)

...I try my darnedest to avoid the pet food aisle in grocery stores.  The smell makes me sick.

...I have a crazy amount of birthmarks on my thighs (Like 8 or 10 total. I'm gonna estimate, not actually count.)  When I was little, I thought everyone had them.  Everyone does not.

...Sundays give me a headache. Unless I'm shopping at a mall. (I'm being completely serious.)

5.  What would you tell your 16 year old self?

You will get somewhat better looking with age...people usually don't peak at 16.  The people who are popular now will be failures (of some capacity) in a few years.  High school is not your life.  It's the very beginning of real life.  There's better things to come.


This anchor tee from Kelly is fabulous.  I spent the day unzipping my sweatshirt so I could show everyone.

Clearance bermudas. Yesssss.  


I bought these at Target and had to stop myself at only buying one bag (they were 3 for $8, so I lost money).  However, they're just white chocolate.  They are good (rarely is candy bad), but I'd rather annihilate a bag (or 3) of real candy corn.  As I did last week.  I went to bed with the shakes every night from the massive amount of candy pumpkins I had consumed.

Happy Tuesday!
Go eat some candy.

March 21, 2012

Peanut Butter and Snickers Cookies

Let's start off by me telling you how not to make these cookies.


Do not chop up Snickers bars and stir them directly into the batter.  Do not, then, scoop them onto a greased cookie sheet and bake at 350 degrees for 10-12 minutes.

The caramel in the Snickers will seep out of the cookies and glue itself to the cookie sheet, no matter how well-greased it may be.  And, after you scrape what you can of the cookies off of the sheet, the cookie sheet will then sit in the sink for eight five days, until you finally decide to clean it.  And it will take you a very long time to clean off all of that caramel.  So much time that you will, in fact, consider just throwing it away.  But you don't.  You keep scrubbing and then, a few weeks later, you try another method with these cookies.

Because the idea of Peanut Butter and Snickers Cookies is too promising not to try again.

My mother-in-law gave me a recipe for a peanut butter cookie with a teeny, mini-Snickers stuffed inside.  It was a good cookie.  And we know that food bloggers and Pinterest-frequenters love stuffing things inside of cookie dough.  However, I don't like complicated cookie recipes and this cookie recipe had a lot of ingredients.  I took a super easy peanut butter cookie recipes and smushed a Snickers bar into it.  Easy, tasty, and I ate approximately 12 of them in less than two days.

I never promised to have self-control when it comes to cookies.


Peanut Butter and Snickers Cookies
cookie base from Chocolate-Covered Katie (or you can use the one from my Recipe Index)

easy Peanut Butter Cookie base (see one of the two above links)
Mini-Snickers bars or larger Snickers bars, cut into 1/4" chunks

Pre-heat the oven to 350 degrees.  Spray a cookie sheet with non-stick spray and dollop the cookie dough onto it in tablespoons.  Push a piece of a Snickers into each cookie.  Bake for 8-10 minutes.  8 minutes equals barely done, which is how I like them (especially if you use Katie's no egg recipe!).

I may or may not have also eaten a half gallon of ice cream over the course of a week by creating some "cookie sundaes".  My advice?  You should also drizzle on some warm hot fudge.  You're welcome. 

Shared at:
What's New Wednesday 
Sweet Treats Thursday

February 12, 2012

Valentine's Day Treats

Do you have big plans for Valentine's Day?

Um, yeah.  I don't.  Besides the fact that it's a Tuesday, my husband isn't here.  So yeah...

However, that doesn't mean treats cannot be made. 

So, what does any good blogger do when in search of holiday-themed treats?  Head to Pinterest, of course.

Are you making anything special for Valentine's Day??  My dessert of choice is usually of the chocolate variety, but, with a classroom party happening on Tuesday, I took the opportunity to make some unique treats that I wouldn't be tempted to eat all of!

These Strawberry Cake Mix cookies are just plain delicious and super-easy.  All store-bought ingredients, but they look like lots of time went into them.


This fudge was too unique for me to pass up.  It comes straight from Shelly at Cookies & Cups.  Such a cute little candy it is...


Finally, I made some sugar cookies and some Perfect Cream Cheese Frosting.  I dyed the frosting pink and swirled it onto the cookies.  Heavenly.  Cream cheese icing takes sugar cookies straight.to. the.next.level. 


I ate far too many of these.  And then I had to fill the frosting container with soapy water before I had a chance to lick it clean.  That's how good this frosting is.  
Shared at:
Crazy Sweet Tuesday

January 30, 2012

Groundhog Day Brownies

A rodent.

A silly little rodent who has, apparently, drank an elixir that causes him to live forever.


This is what Groundhog Day is all about.  If you don't believe me, go to groundhog.org (yes, that's the real address) and look around.

Oh, that^ and lawn chairs, Pittsburgh Steelers' jackets, beer, cold weather, and lots of drunk college students.  Who sleep in tents for days at a time in an effort to catch a glimpse of previously-mentioned rodent.

Actually, that's what Groundhog Day is about.  Sometimes the attendees riot.

But the children don't need to know anything about that aspect of it.

They just need to know that Pennsylvanians tend to regard a rodent when it comes to the weather, so we're going to have a little party.  Parents, you can thank me later for topping off your child's education with this information. 

This is what I came up with for my 1st Annual Groundhog Day party (nope, again, not kidding).

These adorable push-pops were written about by Trish at Sweetology.  I didn't go as far as she did because 30 is an awful lot of push pops to make.  Instead, I did brownies.


Groundhog Day Brownies
makes 30 brownies


For the groundhogs:
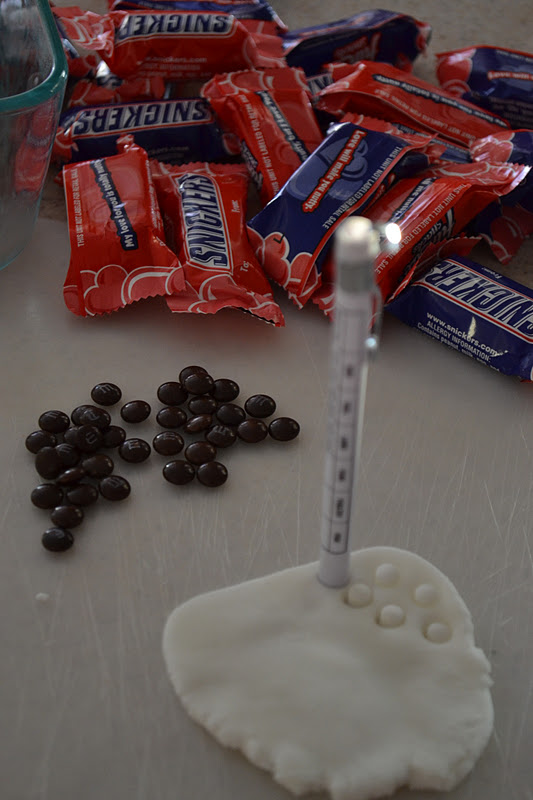
30 mini-Snickers bars
rolled white fondant
1 pink Starburst, softened, broken apart, rolled into tiny balls
Mini M&Ms (brown), approximately 120 (4 per groundhog; I bought a bag of the mini packs for Valentine's Day and had plenty of browns.)
Chocolate sauce/tooth pick

I used the case from a meat thermometer to cut my fondant.  I'm pretty professional.
For each Snickers, push 2 mini M&Ms into the flat side of the bar for the cheeks and 2 for the ears.  Press in a tiny piece of Starburst for the nose.  Cut the fondant into tiny circles, press into the candy bar, and, using the toothpick, dot the centers with a bit of chocolate sauce. 

For the brownies:
2 boxes family-size brownie mix
Ingredients called for on brownie mix box
Chocolate frosting, in a piping bag (I made my own, but I recommend the canned route.  It's easier and cheaper.)

Spoon the batter into muffin cups, filling them about halfway.  Bake in a muffin tin for 13-16 minutes.  The brownie box didn't give specifications for cupcakes, so I started checking for done-ness at 12 minutes.  Let the brownies cool completely.

To assemble:
Spoon out the very center of each brownie muffin and save those scraps/crumbs.  Push a Snickers groundhog into the opening you've cleared out.  Pipe a bit of chocolate frosting around the groundhog and then press some crumbs into the frosting.  Now you have "dirt".  More specifically, a groundhog popping out of the dirt to check his shadow!

Their eyes look crrrrazy!  They must be disoriented, just having poked through the ground and all.
Shared at:  Melt In Your Mouth Monday, Sweet Indulgences Sunday,
Mingle Monday
Crazy Sweet Tuesday, Tasty Tuesday, Tuesday Talent Show
Cast Party Wednesday, These Chicks Cooked 
Stuff for Success 
Mrs. Fox's Sweets Party 
Sweet Treats Thursday 
Coffee and Conversation Thursday 

January 15, 2012

Oreo Peppermint Creams...in case you missed it

This was a guest post at Naptime Creations back in December.  While it's a delightful, fudge-like Christmas treat, I would eat this anytime of the year. 

This recipe is dedicated to my mother.  To her, for Christmas, I give the gift of, "You were right.  My tastes have changed since I was 10 years old and refused to eat anything of the onion, mushroom, bean, or peppermint variety.  You win, Nadine."

I've been going a little insane over peppermint lately.  I think it started last summer with the homemade peppermint patties and now I'm drinking peppermint green tea twice a day and adding peppermint extract to my mochas and hot chocolate.

After I discovered how much I loved the homemade peppermint patties, I saw this recipe and knew it was a must-try.  It would be an almost effortless and tasty addition to any Christmas cookie platter.  Make sure you have a plan on how you're going to get rid of it before you make it.

I'm giving you fair warning.


Oreo Peppermint Creams
adapted from Better Homes and Gardens

crust:
2 1/2 cups finely crushed Oreos (Do this in the food processor.  I didn't.  My crust was pretty chunky.  Yummy, but chunky.)
3 T. melted butter

filling:
2 cups powdered sugar
2 T. softened butter
2 T. milk
1 teaspoon peppermint extract
10 Candy Cane Hershey Kisses

topping:
1 cup semi-sweet chocolate chips
1 T. shortening

In a bowl, mix together the crushed Oreos and melted butter.  Line an 8x8 pan with foil (do not skip this step).  Press down to form a crust and bake at 350* for 8-10 minutes, or until firm.  Let cool.

In a food processor, blend the filling ingredients well to form a paste.  Spread the filling over the cooled crust.  Cover and freeze for a couple of hours.  (I froze overnight.)

In the microwave, melt the chocolate chips and shortening at 30 second intervals.  Stir very well and pour over the top of the frozen filling and crust.  Freeze for at least 2 hours.

Remove from the pan by lifting the foil and then cut into chunks.  Mine was a little messy, and was kind of broken up like bark.

I recommend eating this straight from the freezer.

Shared at:  Sweets for Saturday, Sweet Indulgences Sunday,
Melt in Your Mouth Monday 
Mouthwatering Monday 
Strut Your Stuff Saturday 
Tuesday Talent Show 
Crazy Sweet Tuesday 
The Stuff of Success 
Sweet Treats Thursday


December 20, 2011

Hershey Christmas Bark


It's the last minute.

Good thing this is a quick gift.

I call it Hershey Bark because it's made with almost all Hershey products.  Hershey Chocolate Mint Candy Canes, Candy Cane Hershey's Kisses, Hershey's Semi-Sweet Chips.  They should hire me as an endorser.

Oh, and I used almond bark.  I didn't have white chocolate chips.

Plus, I just like almond bark.  There's something about it.  Doesn't taste like almonds at all.  So why the name??

Anyway..here ya go.


Hershey Christmas Bark
fills a 9x13 pan

3-4 squares vanilla almond bark (about half of the package)
12 Candy Cane Hershey's Kisses, unwrapped*
1 bag Hershey's semi-sweet chocolate chips
8 Hershey's Chocolate Mint Candy Canes, unwrapped and smashed into pieces*
Sprinkles, optional

*These are estimates.  I don't think it matters how much candy you use.

Line a 9x13 pan with foil.  In the microwave, melt the chocolate chips.  I used 45 second intervals.

When melted, stir in the crushed candy canes only.  Spread into the bottom of the foil lined pan.  Freeze for at least 30 minutes.

Melt the vanilla almond bark (again, 45 second intervals).  This time, stir in the Kisses.  The mixture will be pink and swirly and also have large chunks of Kisses, but that's okay.  Spread over the frozen chocolate already in the pan.  Top with sprinkles, if you're using them.  Freeze again for at least a few hours.

Pull the foil out of the pan and gently break the frozen bark into pieces.  Put in treat bags, on cookie trays, or, like me, give as gifts in mason jars.  If you're going to keep it around for longer than a few days, store it in the freezer.

Shared at:
Tuesday Talent Show
Crazy Sweet Tuesday
Mingle Monday 
Stuff of Success
These Chicks Cooked
Sweet Treats Thursday 
Naptime Creations

November 2, 2011

Classic Chocolate Fudge

I'm going through some serious blogging and baking withdrawal while on this vacation. Aside from the entire bag of candy corn that I've consumed so far this week, I've really been craving something sweet.

Today I stopped at the Mrs. Field's at the Maine Mall (in Portland, ME), hoping to get my fix.

I was sorely disappointed.

The chocolate chip walnut cookie was dry and needed a bit of salt.  Yes, I've talked about needing salt in baked goods before.

The white chocolate cranberry cookie was a little too rich but better than the chocolate chip one.

So along with missing baking, I'm missing blogging!  I have so much to share!  Don't fret.  I'll share in the forthcoming weeks.  I'm sure you want to know about the snowstorm and the paralytic shellfish poisoning.

I just commandeered the computer from my husband in order to get my blogging fix.

Last week, while at my parents', I made some fudge.

It was good.  It disappeared in a day.  I recommend adding walnuts.  I didn't because they weren't my ingredients to use in the first place and I didn't know if other plans were in the works for whatever nuts were to be found. 

Photo-wise, this is Instagram.


Classic Chocolate Fudge
from Carnation

1 1/2 cups sugar
2/3 cup evaporated milk
2 T. butter
1/4 t. salt
2 cups mini marshmallows
1 1/2 cups chocolate chips
1 t. vanilla
1 cup chopped nuts (optional)

Combine sugar, milk, butter, and salt in a medium saucepan.  Bring to a full rolling boil over medium heat and stir constantly for 4-5 minutes.  Remove from heat and stir in the marshmallows, chips, and vanilla.  Stir vigorously until all is incorporated.  Add the nuts.

Spread into a foil-lined and greased 8x8 inch pan.  Refrigerate for at least 2 hours before cutting.  I left mine in the fridge for about 6 hours and it was perfect.  Remove the foil from the pan and cut the fudge into squares.

Sharing with:
Cast Party Wednesday
Holiday Sweet Swap
Stuff for Success
Sweet Treats Thursday
Coffee and Conversation Thursday